

Try the demo
View as MarkdownThe demo is a small website built with Uncage (the connected-demo example). You connect your own computer to it and ask for a landing page. Your own Claude Code builds the page on your computer and publishes it to the site through the site’s tools, and you approve the steps in the browser. It takes about five minutes.
The demo’s interface is in Chinese. This page gives each label with its meaning, for example 允许执行 (Allow once).
Run the demo locallyBefore you start
Section titled “Before you start”- A computer with macOS, Linux or Windows. Node.js 22 is not needed up front: the command below installs it if it is missing.
- Claude Code installed and signed in:
curl -fsSL https://claude.ai/install.sh | bash(macOS, Linux) orirm https://claude.ai/install.ps1 | iex(Windows PowerShell), then runclaudeonce and type/login.
Sign in as a guest
Section titled “Sign in as a guest”Open the demo and click 以访客身份进入 (Enter as a guest). The site gives this browser a random guest account; there is nothing to sign up for. The chat then shows 连接你的电脑 (Connect your computer) with one command, on the tab of your operating system.
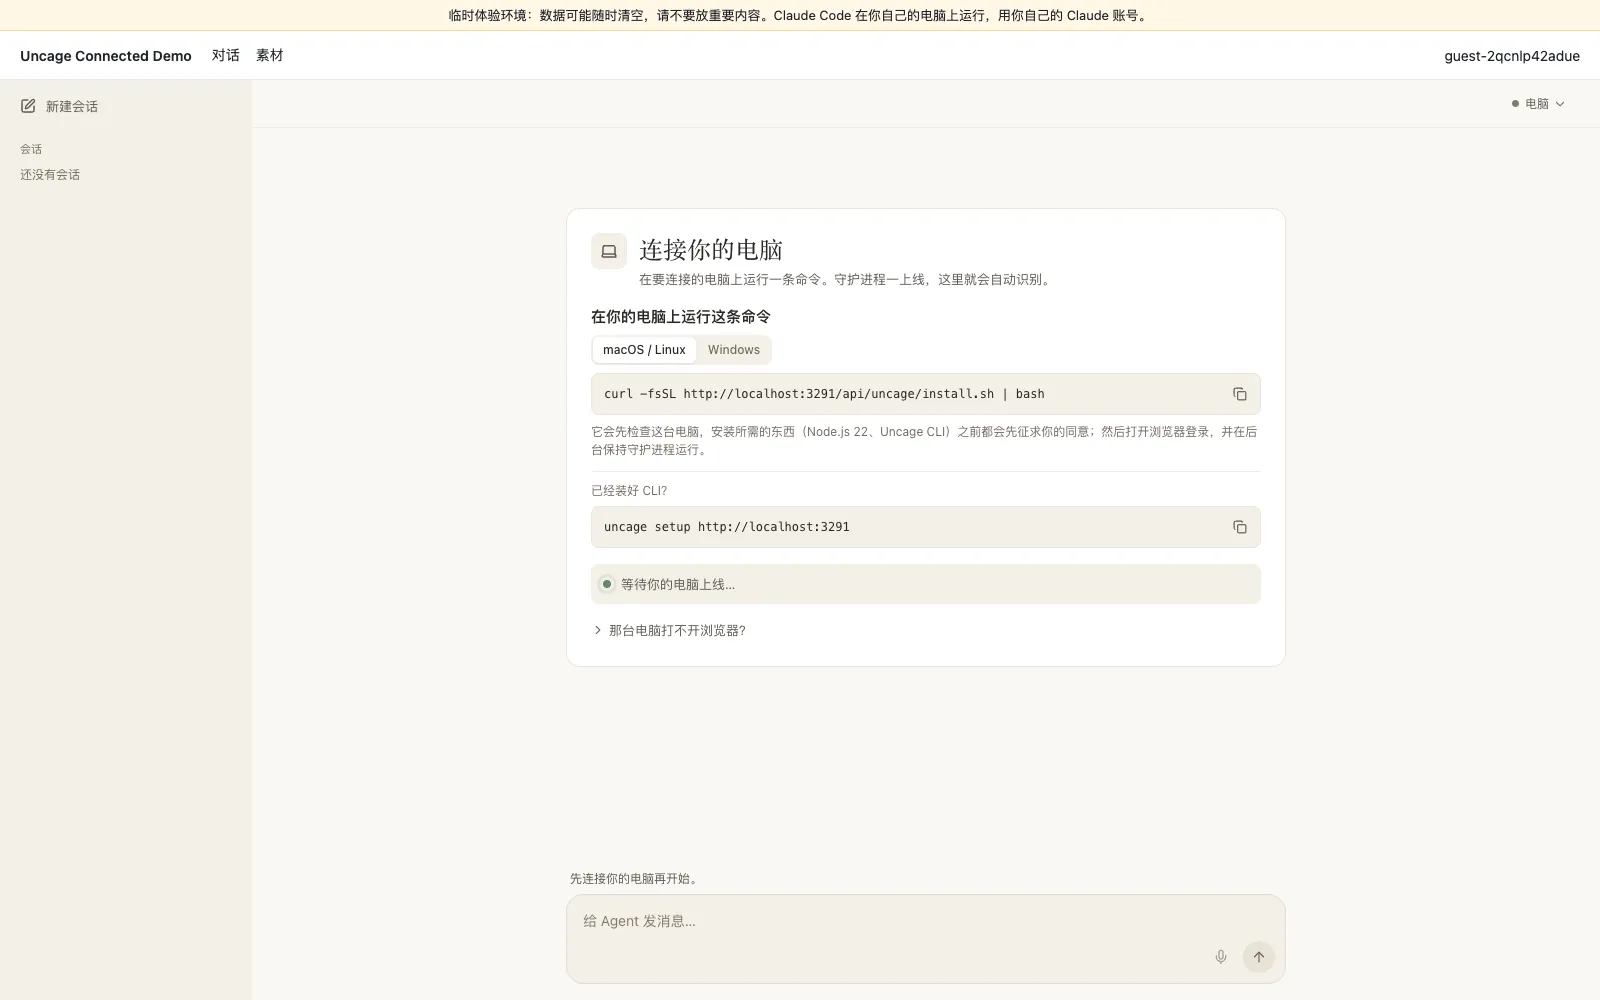
Connect your computer
Section titled “Connect your computer”In a terminal (PowerShell on Windows), run the command the card shows, with the demo’s address in place of <demo>:
curl -fsSL <demo>/api/uncage/install.sh | bash # macOS, Linuxirm <demo>/api/uncage/install.ps1 | iex # Windows PowerShellIt checks your computer and asks [Y/n] before installing anything that is missing (Node.js 22, the Uncage CLI); see Install on your computer. At the end, answer Y to run uncage setup for the demo. Already have the CLI? Run uncage setup <demo> instead. Setup prints a code and opens the demo’s approval page in your browser.
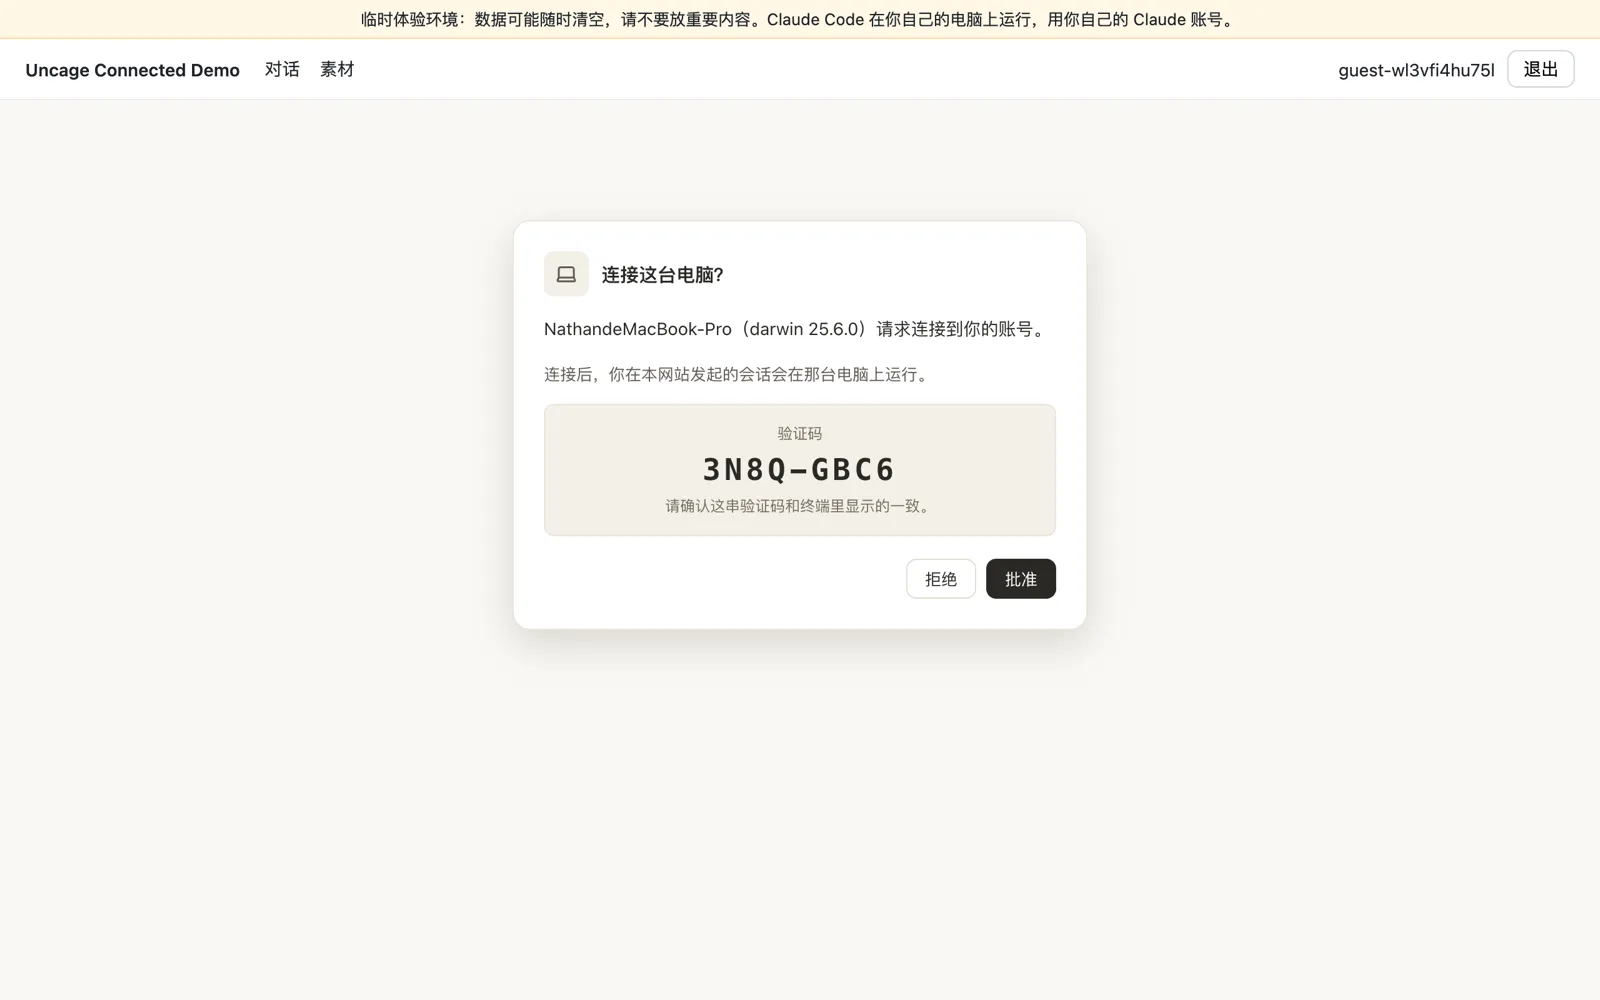
Check that the 验证码 (verification code) matches the one in your terminal, then click 批准 (Approve). The chat shows your computer’s name with a green dot: it is online.
Ask for a landing page
Section titled “Ask for a landing page”Send, for example, 「做一个介绍 Uncage 的落地页并发布」 (“build a landing page about Uncage and publish it”). Claude Code runs on your computer, under your own login, in a folder of its own under ~/Uncage/. It loads the site’s landing-page skill, calls the site tool create_asset, writes the page, and then asks to run publish_asset.
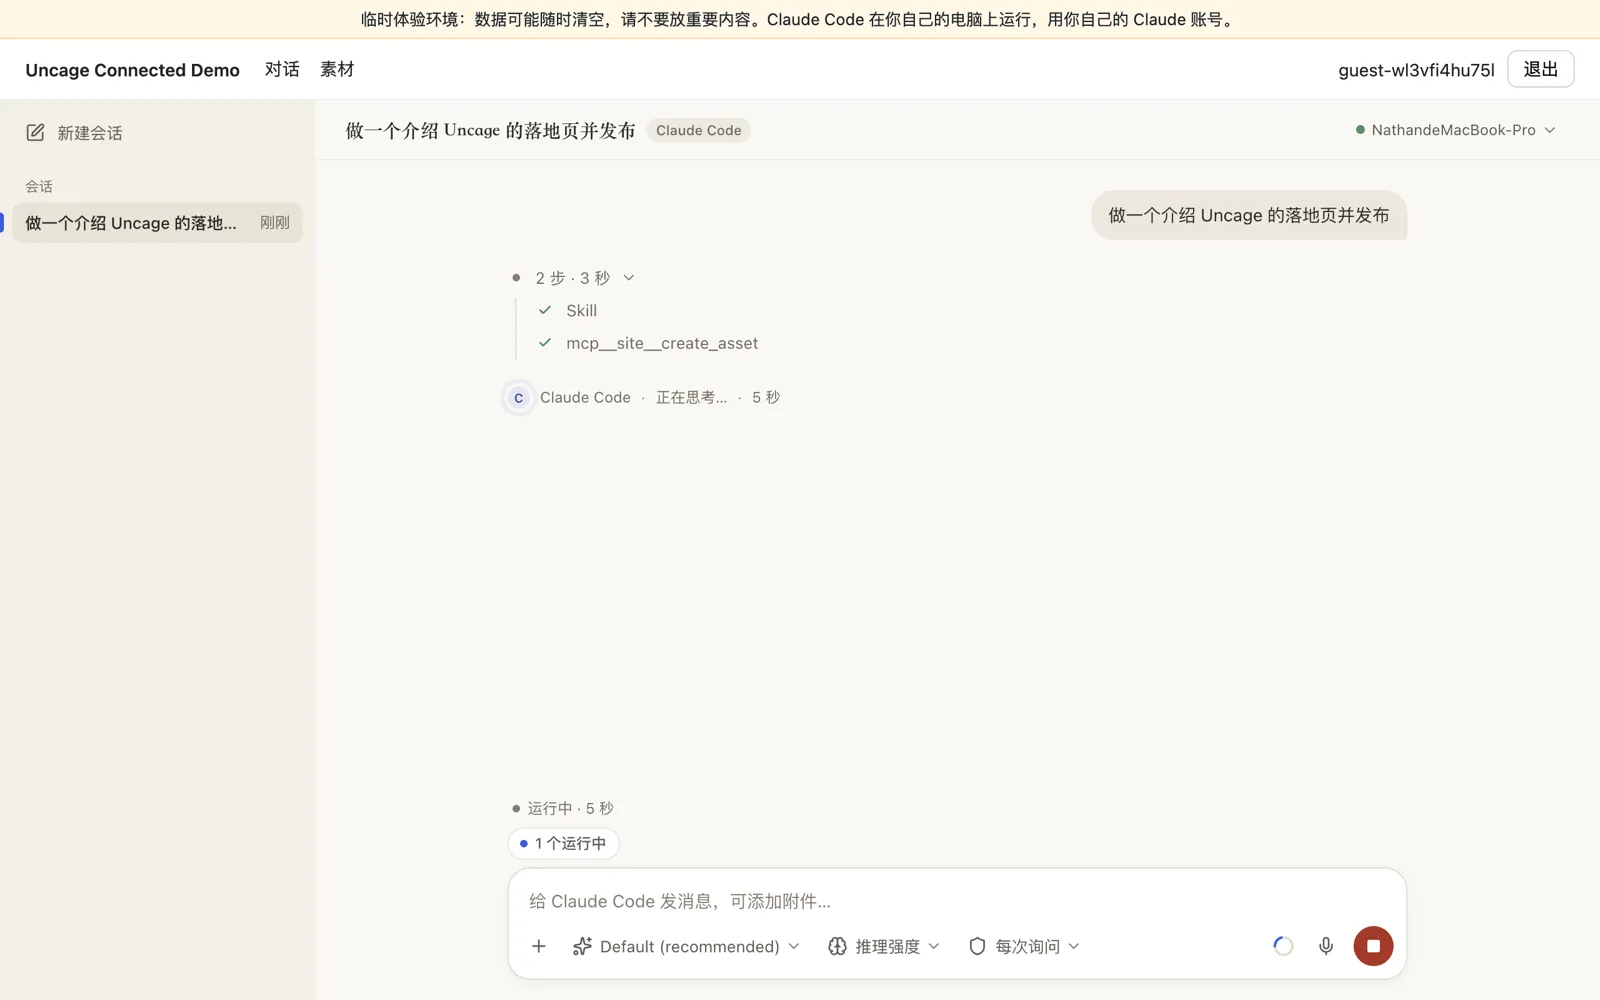
The steps appear in the chat as they happen. mcp__site__create_asset is the site’s tool: it runs on the site’s server, as your guest account, and needs no question.
Claude Code asks before steps that its permission mode does not allow on its own (the composer shows 每次询问, Ask every time), such as running a command or writing a file. publish_asset is defined with requiresConfirmation, so the site asks before every call, in every mode. Each question is an approval card, and the run waits until you answer.
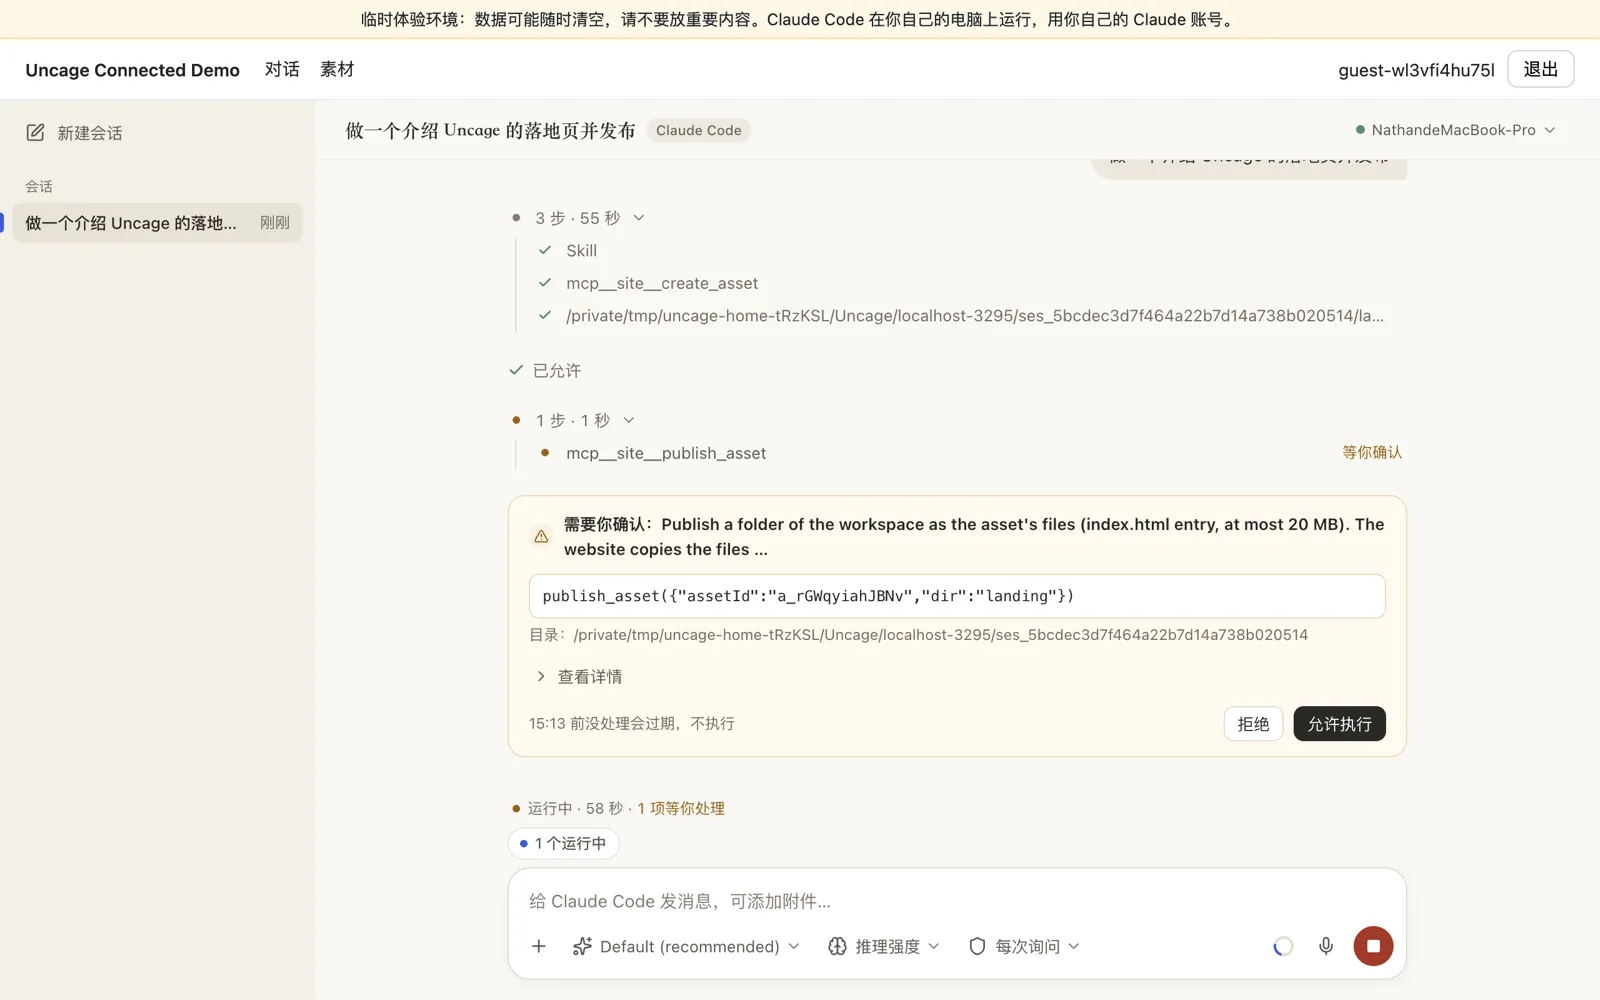
The approval card for publish_asset. Click 允许执行 (Allow once) or 拒绝 (Deny). After 允许执行, the site copies the page’s folder from your computer and publishes it. Steps such as a command or a file write get the same kind of card.
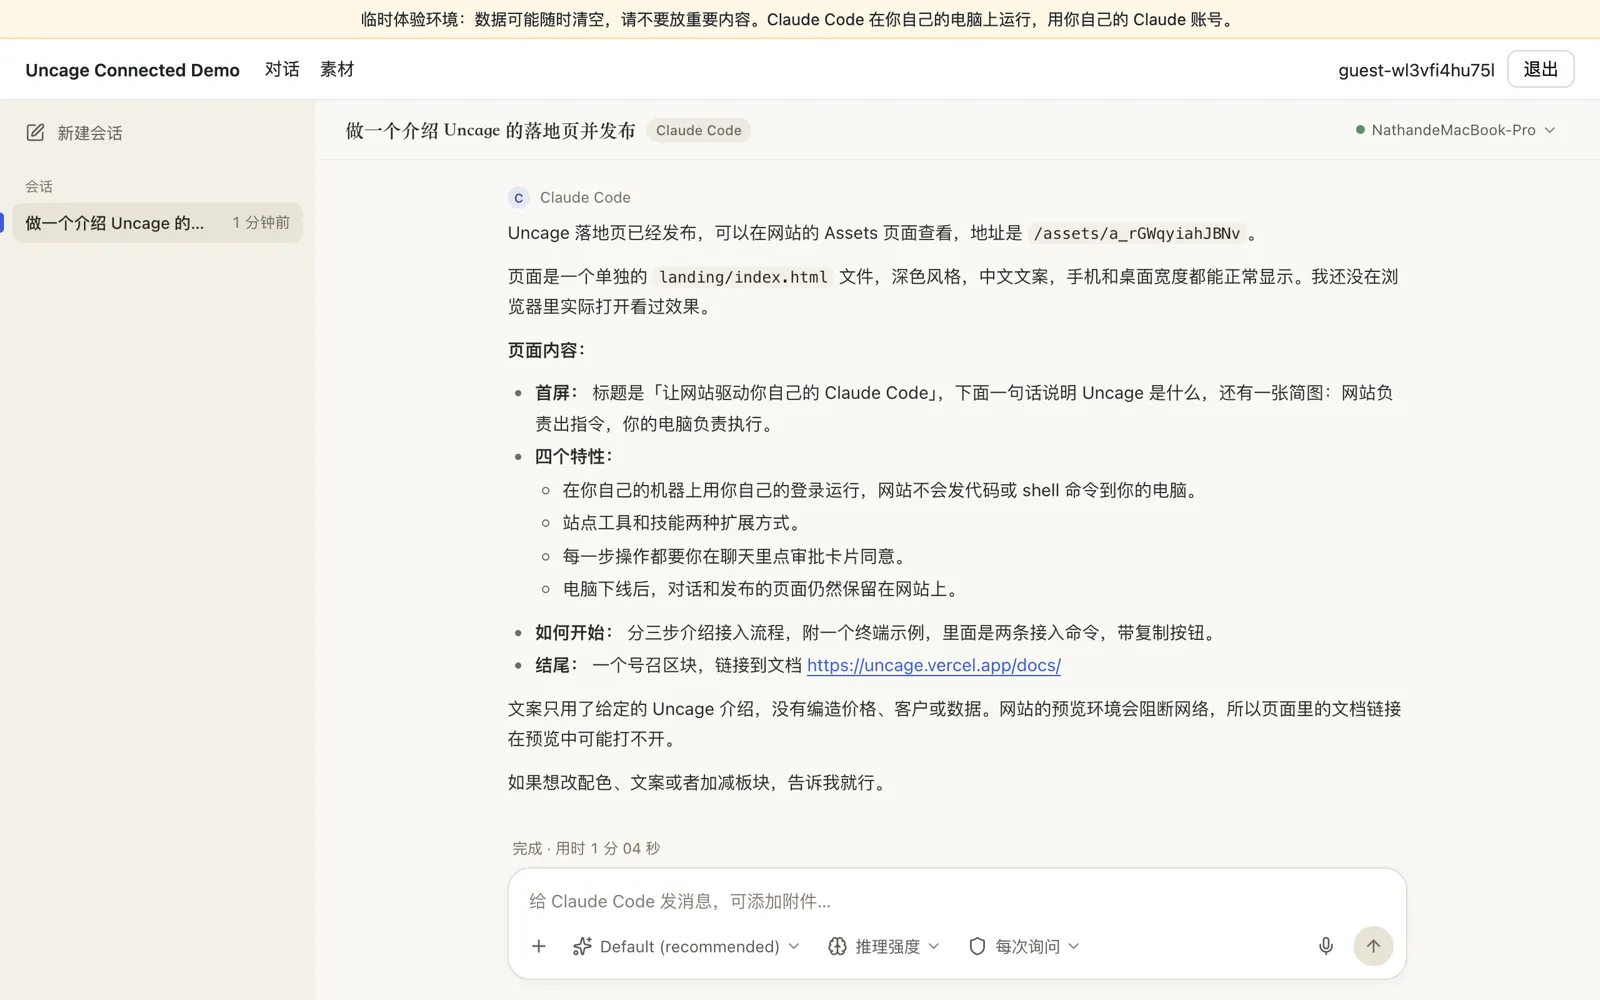
When the run is done, Claude Code summarizes what it built. The site’s landing-page skill gives it the facts about Uncage to build from.
See the result on the site
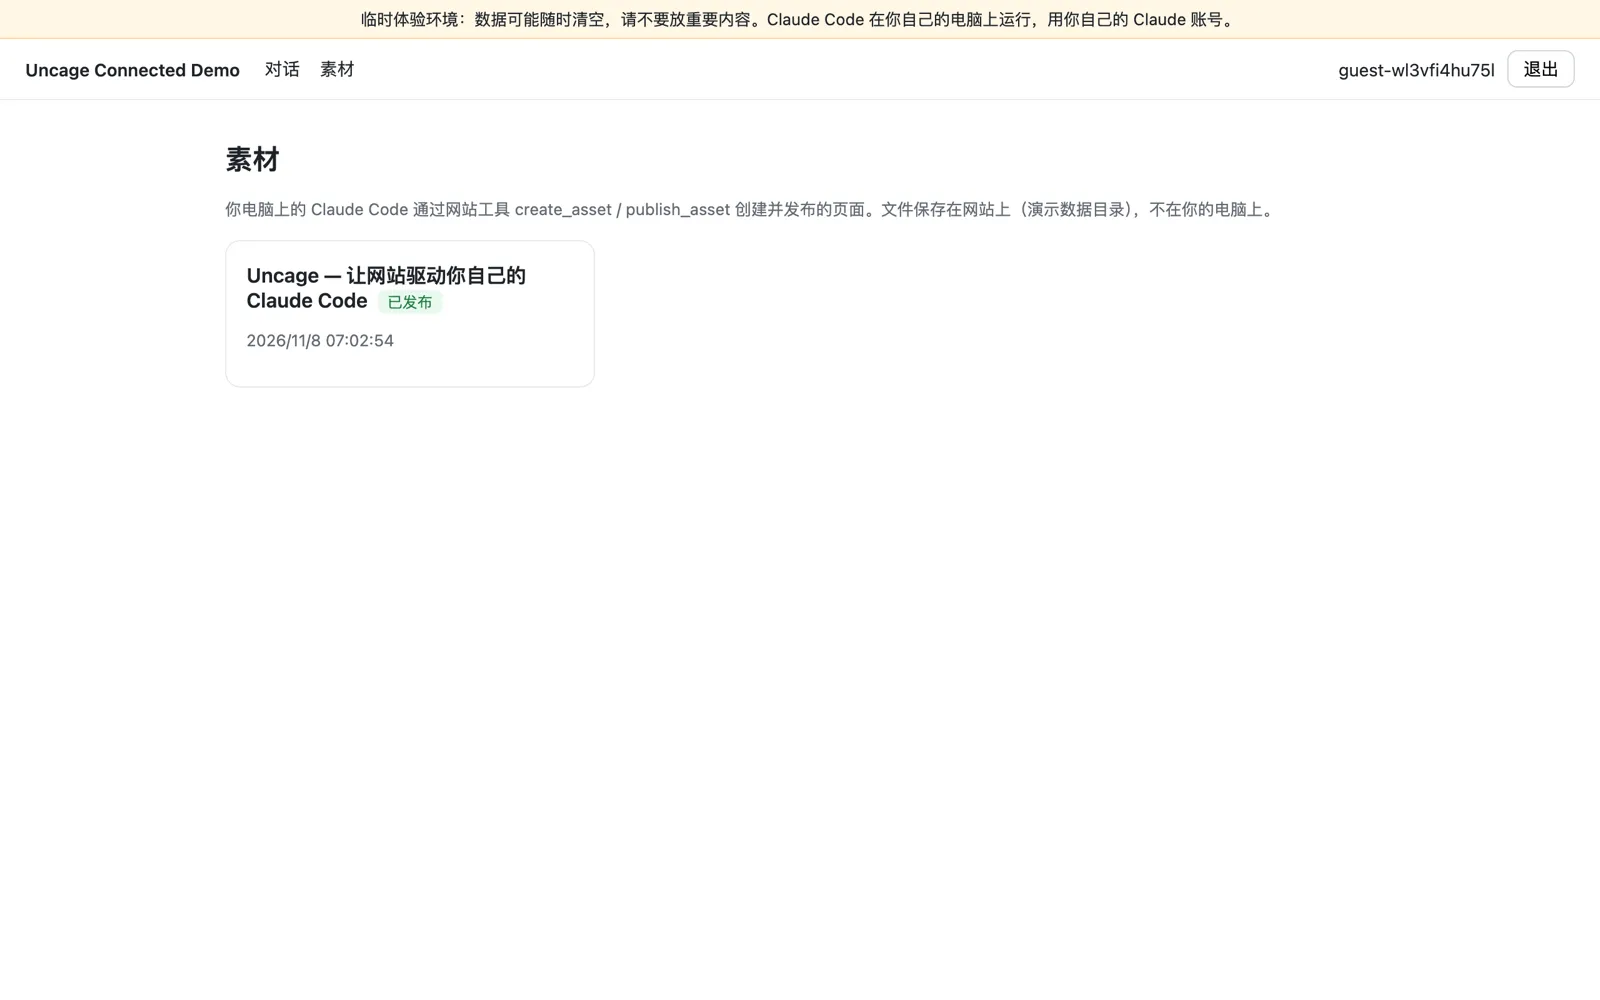
Section titled “See the result on the site”Open 素材 (Assets, /assets). The published page is listed there; click it to see it in a sandboxed preview. The page lives on the website, not on your computer, and only you can open it.
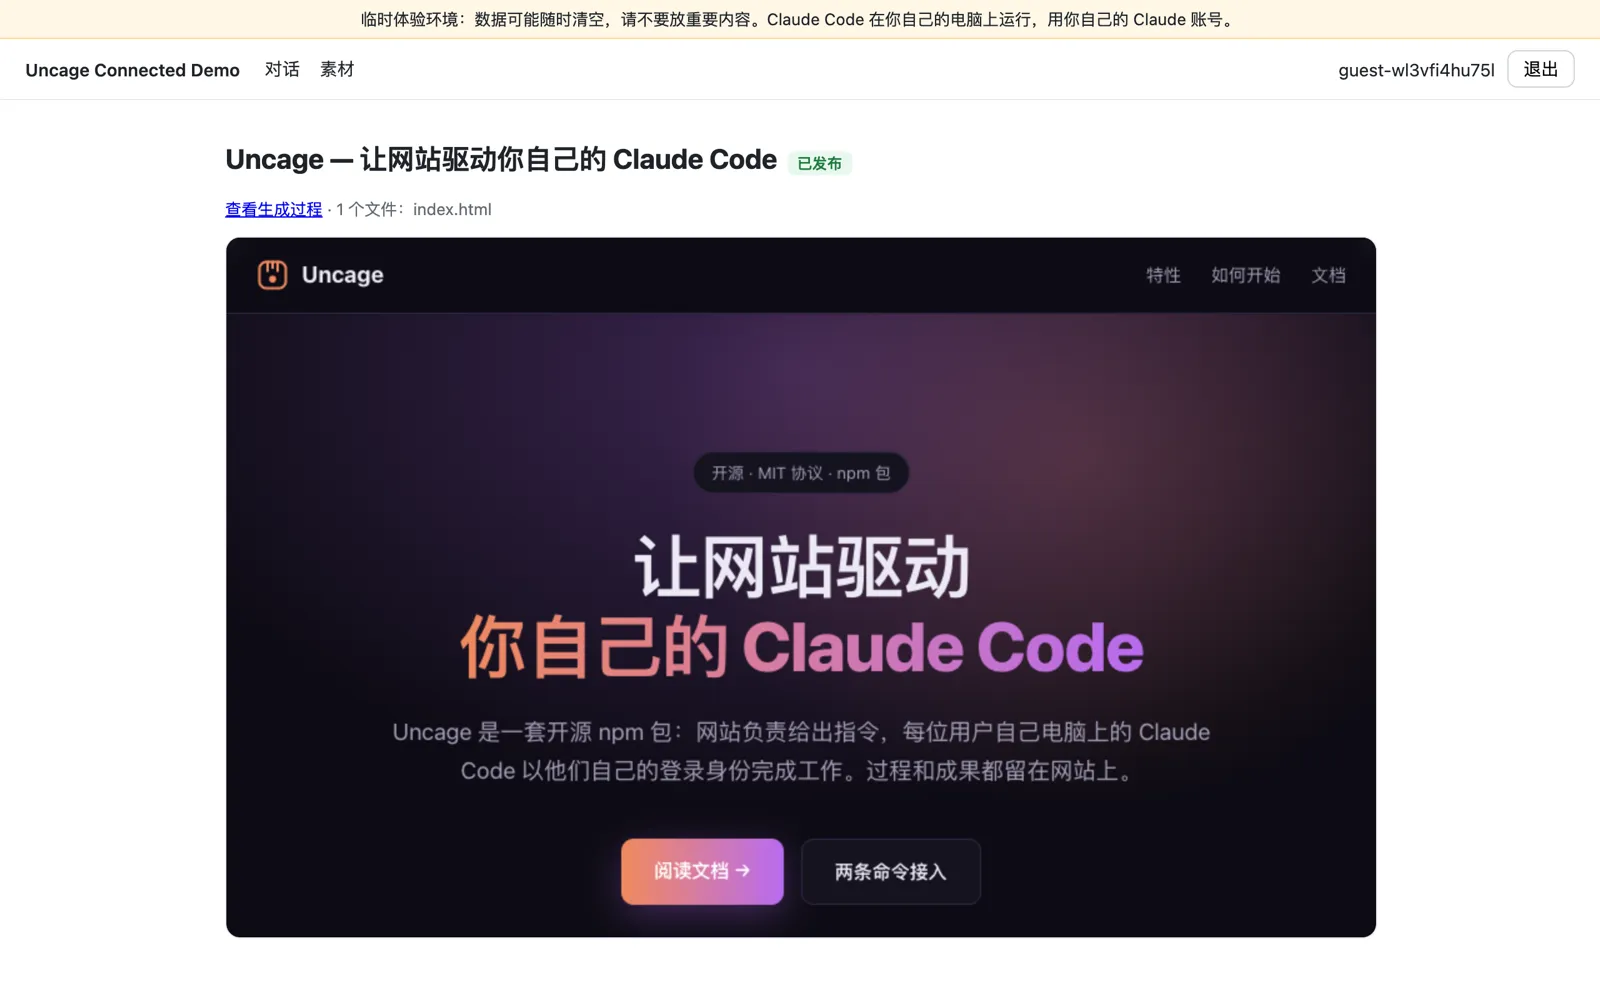
Now close the lid, or stop the agent (uncage agent uninstall stops the background agent). The conversation stays readable, because the site keeps it, and the computer in the header turns offline. Run uncage agent to bring it back.
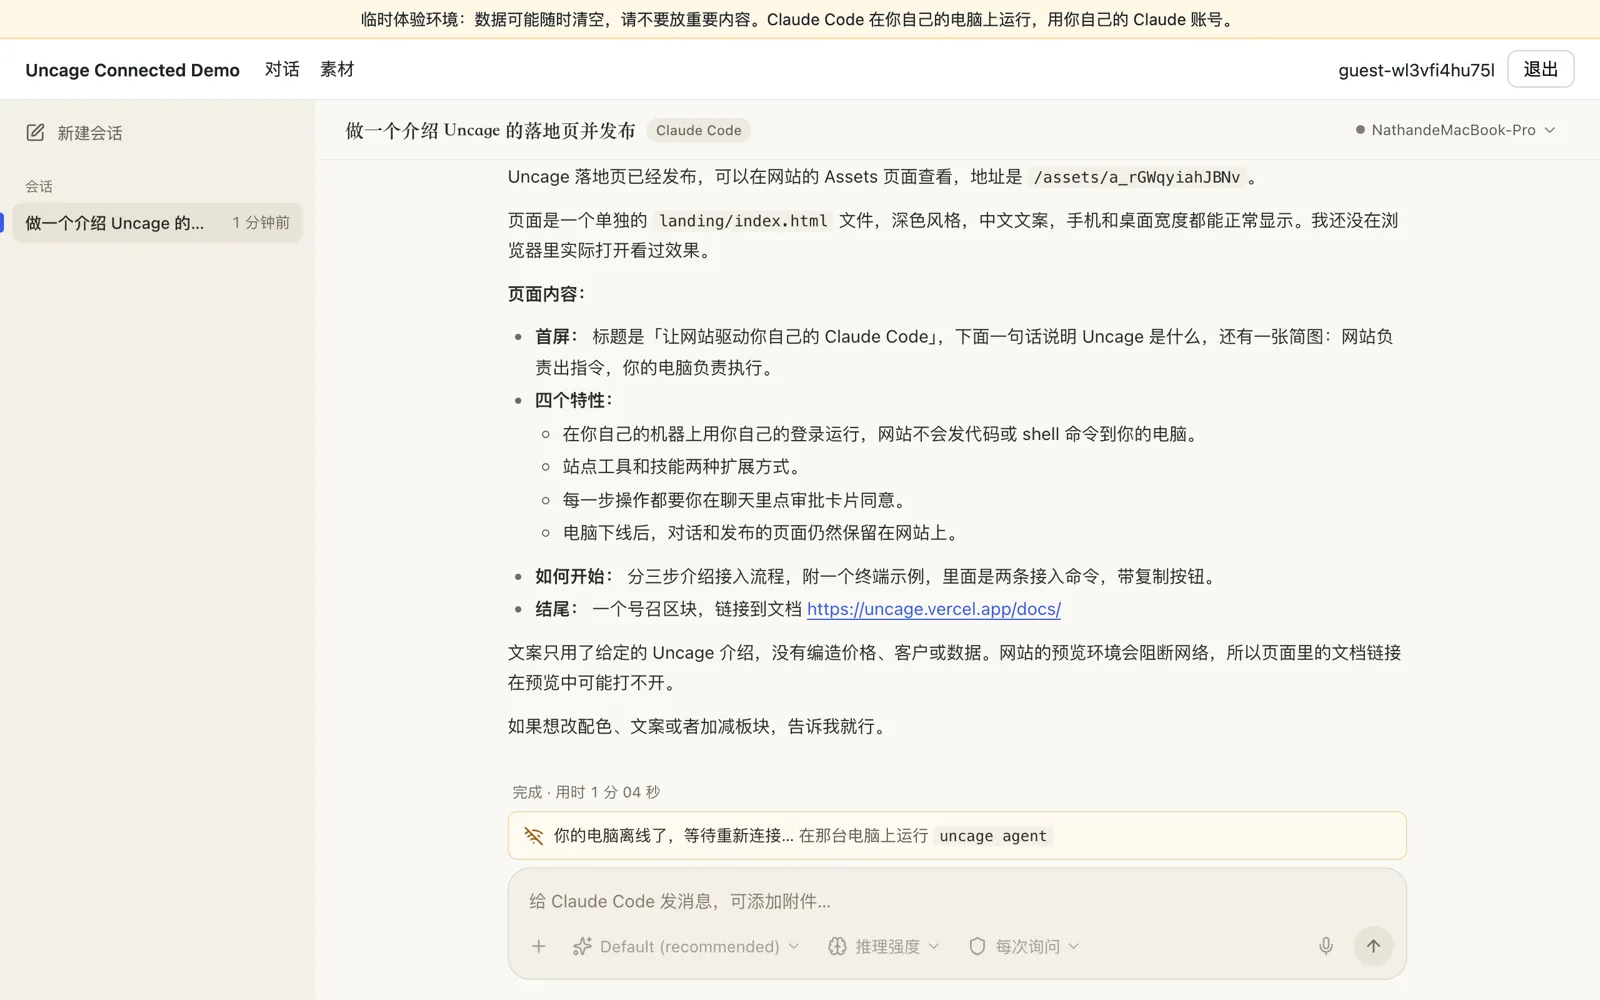
The notice reads “你的电脑离线了,等待重新连接…” (Your computer is offline, waiting to reconnect).
About your data
Section titled “About your data”- You are signed in to the demo as a guest, identified by the browser you use. Another browser sees none of your conversations or pages.
- The demo is public and shared. Running on a single server without a persistent volume, all of its data is cleared on every deploy and restart; on Vercel it is kept in Postgres. Either way, assets (the pages you create) are removed 24 hours after they were last created or published.
- Requests for a published page are owner-only: only your guest account can open it. The files the page loads are guarded by the page’s unguessable ID.
- Do not put anything private in the demo.
To disconnect your computer when you are done, run uncage sites to list the sites it is connected to and uncage sites remove <id> with the demo’s ID to remove it. See the CLI reference.
Run the demo yourself
Section titled “Run the demo yourself”The demo’s source is an ordinary Uncage Connected Mode site with two entry points over the same tools, skills and pages: server.ts for traditional mode (one Node process, for example on Railway) and a Next.js route handler for FaaS mode (Vercel, with Postgres). To run it on your own machine, follow the example’s README. To build your own, continue with Quickstart: Connected Mode, and see Choose a deployment mode for where to host it.